Showing posts with label By Carly. Show all posts

Saturday, May 31, 2014

A More Transparent Me

In October of 2013 I attempted a Breast Cancer Awareness fundraiser with my Thirty-One business. It was a total flop. {Hang in there, this story gets more interesting} I’ve had other successful fundraisers, the most successful and most recent being the Mother’s Day project for the Ronald McDonald House. And it has just recently dawned on me why other fundraisers have been successful and why I received little {more accurately, no} support in my efforts to raise money for breast cancer awareness and research.


I was not open about my personal investment in breast cancer research. I was not transparent about my own experiences. I am not usually open to discussions about my own problems, for the typical reasons: I don’t want your judgements poking around in my life. Even more so, I don’t want anyone who has suffered a more serious diagnosis to feel like I’m comparing my fear to theirs because I know my struggle is minimal in comparison.  I am about to go out of character and share more about myself than I am comfortable with.


In 2008 I found a large painful lump in my right breast and immediately made a same day doctors appointment. After an examination I felt a lot of relief to hear the diagnosis “Fibrocystic Breast Condition” which is very common (in varying forms it appears in about 60% of women). It is not cancerous whatsoever but the masses formed can mimic those that are caused by breast cancer. Breast cancer and fibrocystic breast condition (FCC) both cause breast masses, but from what I understand FCC does NOT increase my chances of developing breast cancer. What it does effect is the ability to detect breast cancer if I were to develop it, especially since now I typically always have a painful mass in one breast or the other. I gladly take these painful lumps over the grotesque battle many other women are fighting.


Again I say, it’s a grotesque battle. Breast cancer awareness is washed in pink, especially so in October. Pink is cute, pink is pretty, pink is easy to look at for most. And I just want to remind you that breast cancer is the opposite. So many companies jump on the “pink wagon” and many product labels turn pink in October to show support. In turn many consumers start reaching for the pink labels to show their support. I’m sorry if I’m being offensive but most of this “pink” is just part of the Marketing Machine. And there lies another of my mistakes. I thought October, being breast cancer awareness month, was perfect timing for a fundraiser but my efforts got lost in a blur of pink marketing methods. Rest assured that when I’m raising funds for a cause, it’s not to entice you to buy a bag so I can turn a profit, it’s to support a mission that I am invested in.


My support for breast cancer is not selfless. Yes, you read that right, I still have selfish motives and I’m about to be transparent once again. I hope to never feel all that a woman feels when she fights breast cancer. I pray to God that I never know that struggle, that weariness, that fear. But if God so wills it I also pray that research has been funded, that innovations have been made, and that my battle would be less than the women who had fought the fight before me.


It’s not October. We’re not surrounded by pink ribbons, pink cans of soup, and football players aren’t on TV wearing pink accessories. You can still donate to Susan G Komen. You don’t have to wait until a designated awareness month to support research and awareness. Susan G Komen does take online donations on their website. Visit: https://secure.info-komen.org/site/Donation2;jsessionid=42074F2E4470C7FE2DB49BD2C71EC3B5.app352b?13842.donation=form1&df_id=13842

Tuesday, January 8, 2013

DIY Mason Jar Soap Dispenser


My 'unsightly' bottle of Dawn

This project is so simple, but still offers savings to enjoy, and a lovely touch of decor in your home. Let me set the scene: I'm home with a stomach virus. While laying on the couch for hours in total agony I've begun a challenging staring contest. My opponent is this ugly bottle of Dawn setting out on my sink. My house is tiny, I really can see this Dawn from my living room sofa with ease. It's bothering me... I might have cabin fever.

It's more efficient to set it out than to have to fetch it from a cabinet every time I need a squirt of Dawn's grease fighting power. But it's just not cute enough to match my new measuring spoon display, don't judge me! Ha ha ha.


A pump bottle could be so cute right? Right? Remember my post about saving all my jars? Check it out here. I have a collection of jars on top of my refrigerator, just waiting to be upcycled and put to good use. I also have a collection of bottled lotion with pump tops waiting to be slathered on my skin. Today I finally saw a bottle to it's end and commandeered the pump top.


I selected a left over mason jar to be my new soap dispenser. The assembly was incredibly simple. I started by stabbing the lid of the mason jar with a steak knife. I could have probably chosen a better utensil for creating this whole, but I get impatient and the steak knife was handy. Anyway, I started with cutting an "X" into the lid and then worked the whole bigger and bigger until the pump fit through the whole. I stopped several times to check and see if the pump fit yet. I wanted the pump to fit snugly. I roughly measured the length on the pump by holding it against the mason jar and snipped off the access with a pair of scissors. Next I secured the pump to the lid with hot glue.


Joe would have been totally aghast had he seen me doing all this. Using the wrong tools, doing 'rough' measurements, spray painting the grass... But if Joe had done this it would have taken several hours and we would have had the same final results. This adorable soap dispenser! I'm anxious to free up another pump top so that I can create a matching dispenser for hand soap. I'l have very soft and moisturized skin until I can get another lotion bottle empty.

You don't have to use a mason jar for this project. An easily disposed of empty jar of spaghetti sauce, olives, or pickles could be your next soap dispenser!


Do you have a DIY project you're itching to share? Let me know, I'd love to have you share your ideas here as a guest author!
Thank for reading :)


Sunday, January 6, 2013

Cabinet doors as organizing solution? Genius!


organizing measuring cups and spoons (6)
my inspration: found at
www.infarrantlycreative.net
More than a year ago, I pinned this photo. It caught my eye because my measuring spoons and cups are always a hassle. I've thought to myself a million times that there must be an easier, nicer looking way to keep them organized. Then bam! There it is. The source of the pin is http://www.infarrantlycreative.net and you can read their post about organizing measuring spoons here.
my own disshelved measuring
cups and spoons

Joe would never let me take a drill to a cabinet door unsupervised and it's taken me a year of showing him the photo and pleading, can we do this one this weekend? (It might sound sexist... but you didn't see what I did to the wall trying to hang a mirror.) Today was the day! He did most of this project while I watched. Joe did let me help a little, I got to hold the level. I'm pitiful, I know, but I learned a lot! Maybe before too many more projects have passed he'll trust me with the power tools again :)


The original pin, my inspiration, is shown using paint sticks. Good choice because hardware stores will give them to you for free. We had some paneling left over from a recent project in the bathroom, rather than make a trip to the hardware store for free paint stirring sticks we used up our scraps. Joe measured the cabinet door I selected and cut the long strip of panel into shorter pieces according to his meticulous measurements (Joe does everything meticulously).

I used some left over Rust-Oleum spray paint, which made the old white strips of scrap panel look like fake stone (That's right, I painted them not Joe. I did get lectured later for not properly cleaning the spray can's valve.) I think it looks nice, especially for having just thrown some left overs together.


Next, Joe measured and drilled nice, evenly spaced, level holes in our panels. After he drilled the holes I screwed in the hooks.

Joe vocalized a few tips and learning experiences for me as we got to the step where we attached the panels to the cabinet door. Number 1, make sure your screws are NOT longer than your cabinets are thick. Or else your screws will come busting out the other side of your cabinet door. That would not be pretty. (This might seem obvious to you, but I honestly wouldn't have thought about that. I know, I'm pitiful). Number 2, compare your screw to your drill bit and then mark the bit with tape. This is to be sure you don't drill all the way through your cabinet door. That would also not be pretty.
Joe's hand modeling
career is up and coming!

Meticulous Joe marked the cabinet doors and the panels to make sure we were hanging the panels level. This is where I came in and helped by holding the level! He assures me my role was very important. My husband wouldn't patronize me, would he?

Now, I went through my measuring spoons and cups and realized I was missing at least one spoon or cup from each set. So, naturally, I had to buy new ones. I mean, now my spoons are pretty much on display. I have to have one nice matching set. Or two :)


I hope you like the finished product as much as I do! 

We live in a VERY small house. I plan on taking on a lot of organizing projects before the new baby gets here in August. This one didn't clear out much space, but it was long over due. In the near future I have a whole room full of junk (from our current guest bedroom/office) to incorporate into other rooms of our house in order to make room for a second nursery. We're going to have to get creative, and I plan on sharing all of these creative solutions with you! If you have any unique organizing solutions for small spaces I'd love to hear from you!

As always, thanks for reading!


Tuesday, January 1, 2013

How to transfer a photo to.. anything, for pretty much nothing


On December 5th, 2012 Joe and I discovered that we are expecting our second bundle of joy. I broke the news to him in a mostly lame way: picture message of the positive test while he was at work. I know, I know! Complete lack of creativity. Lets face it, I was exhausted, he was working late, and I knew he would want to know right away.

We've decided to let Logan break the news to our relatives at our various Christmas gatherings, I am pretty excited about our creative pregnancy announcement. Logan, being only 17 months old, doesn't have much of a vocabulary. How will he tell everyone the big news? He'll be sporting a custom red turtle neck that proclaims "I'm going to be a big brother! August of 2013" Joe and I aren't going to say a word. We're just going to wait until someone realizes what his shirt says and let the excitement spread.

Of course, you will be reading this after the fact. We don't want to ruin the surprise for anyone :)


There are plenty of places where you can get a shirt printed, but I like to do things as economically as I can. Here's how I customized Logan's shirt, the picture transfer method I use for my shirt template can be used for about nine-trillion projects.

What you'll need:
Freezer paper 
Copy paper (or construction paper)
Spray adhesive (or other adhesive)
Ink jet printer
Scissors

Step 1: Cut a piece of freezer paper to measure 8.5 x 11, exactly the same size as your usual copier paper.


 Step 2: Use an adhesive to attach the copier paper and freezer paper back to back. Make sure the waxy side of the freezer paper is facing out. I really only used colored construction paper so that you could see what I was doing better in the picture here. ** If you don't have spray adhesive handy I'm sure mod podge or a glue stick would do the trick.


 Step 3: Print your picture onto the waxy surface of the freezer paper. You may want to run a test page first to make sure you're putting your freezer paper through the printer right side up. Also, especially if your transferring text, make sure your printing a mirror image. You can see in my Word doc below that I did a vertical flip with the WordArt.


Also notice how the ink is pooled on the waxy surface of the paper. The wax coating prevents the ink from being absorbed into the paper and allows the transfer. This also makes is extremely easy to smudge! Be careful not to smear the ink. Because of the way the ink pools on top of the wax I'm not sure this would be a good method for transferring complex detailed pictures. 

Step 4: Before the ink dries, press the picture against the surface you want to transfer it to. Press and rub in a circular motion for a minute or two making sure to have pressed the entire span of the picture against the item you're transferring it to. Be very careful that the paper doesn't move while you're doing this or else your picture will smear.


Step 5: Remove the transfer paper and marvel at your good work 

This is a pretty much horrible picture. Sorry bout that.

The ink doesn't stand out much on this well worn in cotton fabric. It would also fade so fast it would be gone in two washes. So in this project I was just transferring the picture as a template for my fabric paint.


I think the finished project shouts the good news loud and clear :)


Wipe off your transfer paper to re-use it for future projects!


Always Kiss Me Goodnight - romantic wall words vinyl home decor lettering graphic calligraphy old barn rescue company

Maybe you want to transfer text to a wall to create a look similar to this vinyl wall art that you can purchase on Etsy.

Or you could transfer a picture/text to canvas or painted wood to create your own wall art.

I feel like the possibilities are endless!


I hope you found this helpful! If you you have tips, tricks, or if your going to use this transfer paper in a project of you own please let us know!

And thanks for reading :)

Monday, December 31, 2012

My Blogging Lessons of 2012

Today, this fateful last day of 2012, I would like to reflect on the lessons I've learned this year as a new blogger.

My first post, about mine and Logan's moon sand adventure, was published on November 11th. This means, could it be? I've only been blogging for 7 weeks! In the past 7 weeks (still can't believe it's only been 7 weeks!) I've learned a lot about the blog-o-sphere. 

Making Moon Sand
I think the most important thing for a blogger to learn is also the most obvious and probably doesn't need to be mentioned. I'm going to go ahead and throw it out there anyway: publish useful and original content. It's probably best that you learn this lesson before you even click that "Get Started" button and register for your first free blog account.

Find a photo editor and edit those photos. The most useful tip I've learned thus far is to edit my pictures with pixlr. I don't understand how pixlr escaped me, how did I not know about this amazing and FREE photo editor? I have to give credit where credit is due. I discovered pixlr while reading "10 Tips for New Bloggers... From a New Blogger" which I found on Lauren's blog "The Thinking Closet". Lauren saved me a nice chunk of cash. Before I found pixlr I was actually considering purchasing a photo editor just for the few features I need to touch up photos for blog entries. I've since then learned to use pixlr's advanced and efficient options. I've been able to create our custom headers, our social media buttons, and our background on top of editing photos for articles. Did I mention it's free?

"DIY Household Cleaners"
One of those articles I just couldn't
wait to publish... that no one read
 Design your site to be simple to navigate, easy to look at, and reflect your content BEFORE you publish your first post. This is the lesson I learned too late. My head was full of article ideas for money saving tips and so many other useful tid-bits and I was so anxious to get the knowledge out there that I put web design on the back burner. That was such a big mistake! The dynamic template I was using through Blogger was hard to understand and navigate, it gave my content a poor presentation, and it was overwhelmingly generic. No one bothered to tinker with it long enough to read any of my articles. Finally I caught the hint, and spent some time educating myself on the options I have through Blogger to customize our look (It helped that Jamie told me "I hate the way this looks" and I agreed.). I found a layout that was simple and began to customize widgets and write/edit code to come up with a look that suites "Living With Joe; the dialogue of two moms". Don't make this mistake, design your website first! Get inspiration from other blogs. I really enjoy the look of "Sweet T Makes Three" and "One Good Thing by Jillee" and even googled how to make some of their design concepts a reality for our Blogger sponsored site. Even though our look has come a long way I don't think we're done yet. If you want any help with your own blog please don't hesitate to ask! I love to help. No doubt, coming soon will be a post containing all the websites I visited for tips and tricks on customizing our blog.


"Unorthodox Diapering"
Another of my early posts
with low traffic
Connect with your readers. On December 11th I took a leap of faith and made a twitter account, a facebook page, and a pinterest account for "Living With Joe; the dialogue of two moms". And then made the addition of coordinating "Follow us on..." buttons to our side menu. Why was this a leap of faith? Because if no one follows us there's blatant evidence right there on our pages. The sad messages "0 people like this on facebook", "2 followers on Pinterest", ect. There's also the ridicule from the unsupporters in my day to day life, "You made a facebook page for your blog?". But the truth is, I didn't start publishing these articles for my own good, they're not for me to read. They're for you, so I need to have a way to get them to you. Not to mention a way for you to share the articles with other people who might be helped by the information. I also created the email address info@dialogueof2moms.com, giving our readers a way to communicate with us without having to leave a comment for the world to read.

Give your blog some predictability. Being the mom to an 18 month old little boy, the wife of a hard working man, the keeper of a home, the head of a customer service department (actually, the only person in the customer service department...), and an independent sales consultant leaves little, I mean no time for a structured blog posting schedule. Which also means no predictability for our readers. I've been trying to change that with our "Food Friday" posts. Maybe our other posts about beauty, life lessons, and DIY projects are at random intervals, but you can count on at least one new recipe every Friday. 

I hope that sharing my lessons learned helps you get a head of the learning curve! If you have a tip of your own don't be bashful, share it with us :) And as always, thanks for reading!

Custom Christmas Coffee Cups

"Grandpa Cy- a man that worked so hard at being Dad,
he got promoted to Grandpa." 
Here's another of our homemade Christmas presents from 2012. Custom Christmas Coffee Cups. (You should pin this for next year. Just saying, he he) This one had a decently large amount of instant sentimental value to everyone that received one. We even saw a few happy tears from a recipient, which was one of  best feelings that I experienced this Christmas.

Joe and I decorated one side of each cup and Logan decorated the other side. Logan's side is covered in scribbles, none the less, I know his craftsmanship is what gives this gift it's value.

Making these mugs is so simple, but it was not quite what we expected.

To decorate a coffee mug, or any piece of ceramic glassware, just use Sharpie markers and then bake  it for 30 minutes at 350. It sounds really easy, right? Like the only challenge is deciding what to put on your dish of choice, right? We did learn a few lessons along the way...
Noni \nah-nee\ (n):
A woman with a garden of love
growing in her heart

1. Yellow turns our brown and looks disgusting.
2. Red, orange, and green will wear off the most quickly.
3. Pretty much, that means only use black or blue.
5. They are NOT dish washer proof, not even abrasive-side-of-the-sponge proof.
5. Basically, they're only good for sitting on a shelf and looking pretty.

It seems to me that the ink probably would have stuck around just as long if we hadn't bothered to bake the mugs. I'm not certain, but the projects many failures may have been because our ancient oven varies  in temperature rather than maintaining the 350 that I requested from it.

I explained to everyone, after they opened their cups, that they had to choose whether the functionality of the cup or the decorative scribblings of an 18 month old were more important to them (because, if you didn't catch on, the words are going to wash off after a few uses). Everyone still enjoyed the thoughtfulness and the sentimental value of their new decorative mugs. Not to mention we had a lot of fun making them, especially Logan :)


Sunday, December 30, 2012

Adult Hot Chocolate


Now that Christmas is behind us I can finally share all my DIY Christmas present projects from this year! Go ahead, pin this for next year :)

For our co-workers Joe and I put together these Adult Hot Chocolate kits. The Christmas season is very busy and stressful for us at work, so we came bearing the gift of holiday stress relief. In each mason jar is a serving of Swiss Miss powdered hot chocolate mix, a handful of marshmallows, and small bottle of a complimenting liquor.


I got the miniature bottles of liquor at the local liquor store, Noonan's. We bought an assortment of mint chocolate, mocha, and caramel liquors. The quilted mason jars were at Kroger's and, conveniently, they came with those cute labels that I filled in with 'Merry Christmas!' I attached the little bottles of liquor with a simple piece of red yarn. The final touch, my homemade label:

Cute, right?


Stay tuned to hear about our salt dough ornaments, and hand decorated Christmas coffee mugs!

I also made custom decorated candles using the same method I used to make the memorial candles I already posted about. You can read about them here. I ended up making 9 more sets of memorial candles for other family, and 6 more candles as Christmas presents. 


Sunday, December 23, 2012

Skin Care Routines

Dedicated to Jillian

I've been recently asked about tips for dry skin, which is especially common during these winter months. I have a handful of tips, and the response is a little long for a facebook comment so I'm making a post just for my new friend Jillian :)

Ladies, it's recommended that we have a daily skin care routine. Everybody's skin is different so everyone's skin care needs will be different. Typically everyone's routine should contain steps to cleanse, exfoliate, moisturize, and protect their skin and should be preferably performed in the morning and again at night.

Step 1: Cleanse

It's hard to shop around for skin care products, their so many different kinds and their usually so expensive.

I use a homemade cleanser daily and you can find the recipe here. For dry skin, I would recommend that you use 2 parts coconut oil with 1 part castor oil, rather than equal parts like the recipe suggests. For example use 2/3 cups coconut oil with 1/3 cup castor oil and you've just made about a 6 month supply. This recipe is great for removing make up and free radicals, works to keep your skin moisturized, and even made my eyelashes longer (check out my follow up report after I'd used it for a few weeks here)

Some other options for finding a good cleanser, without buying the whole pharmacy, would be to contact some direct sales consultants (for example: Avon, Mary Kay, or Amway). They'll let you try products before you make a purchase and even help you find which of their products will work best for your skin. Be careful, though, some of these consultants can be pushy sales representatives.

Step 2: Exfoliate

Face scrubs and microdermabrasion are good examples of facial exfoliation.

My home made recipe can be found here under 'Daily Face Scrub'. If you don't have all the products needed for this particular recipe you can literally use baking soda and water (there's a recipe on the Arm & Hammer box!).

When you exfoliate you knock of all the dry skin cells and reveal the healthy skin underneath. Which sounds awesome when your fighting winter dryness, right? Just be careful, over exfoliation can have a reverse effect. I would recommend exfoliating 3-4 times a week, rather than daily, and then you can increase to daily if it seems necessary.

Step 3: Moisturize

This one is probably most important when your fighting off dry patches. If you're using a brand from the pharmacy for your cleanser that brand probably has a recommended moisturizer it should be paired with.

To do things the more economical way you can also use whipped coconut oil, just use a mixer to whip a cup of coconut oil. If you don't like the way that makes your skin feel you can also try Aloe Vera gel, or unscented baby lotion. You might have to try a few different things to find the moisturizer that works best for your skin.

Step 4: Protect

It's recommended to use a SPF that's sensitive enough for your face every day. It's less expensive to just avoid the sun or wear a hat :)

You can protect your skin during the day with a foundation, SPF lotion, or even a translucent face powder. I've just begun making my own translucent face powder, see my recipe here. You ca use it alone or wear it over your make up.


Thursday, December 20, 2012

Memorial Candles

This year our Christmas celebration is going to be a little smaller than it has been the past few years. There are two people we love and miss that won't be able to make it because they had very important appointments with Jesus that they had to keep. On February 29th Frank, my husbands grandfather, received an offer he couldn't refuse. The opportunity to go to heaven and never feel pain or suffering again. I know its selfish of us, but we simply weren't ready to see him go. We were all still trying our best to cope with life without Grandpa when we received more life changing news. On May 4th Tina, Frank's daughter and my husbands mother, followed her dad to an eternal peaceful slumber. It's never easy to loose a loved one, but I feel like the younger they are when they leave us the harder it is to understand why they had to go. Why did they have to go? I think we all ask this question when someone we love is gone, but I don't think that question truly has an earthly answer. I think the answer is beyond human understanding, it's more than we can wrap our very small human perspectives around.

The back to back losses have left our family with a roller coaster of conflicting emotions. Actually that's an understatement, but if I get into the entire spectrum of emotions that all of my surviving loved ones have felt I'll never be done typing. For me, right now, the hardest part is watching everyone I love suffer through their grieving. I do my best to encourage everyone to remember the good times, the funny things said, the delicious meals shared, and all the moments of great pride. I know my words fall short of causing any real healing because I've hardly convinced myself to maintain that perspective. I continue to try.

For Christmas I wanted to have a real memorial for Frank and Tina. Something we could see and touch to remind us all of the good times we shared with them and to reassure ourselves that we haven't, and wont, forget to celebrate their lives.

I don't know what reminded me of it, but many months ago I saw a pin for making your own customized candles. I was trying to find a way to honor Frank and Tina while giving my family a memorial to remember them by and I decided to make memorial candles. 

Most everyone I know has someone they love who now lives in heaven. Just in case you've been searching for an idea, like this, to honor a loved one with I'm going to share how easy and affordable it is to make your own.

I spent a great deal of time finding perfect and comforting quotes. It was a more difficult task because I had to find two. Whenever I found one I liked it seemed that the previous quotes we're less adequate. I didn't want to feel like I'd given Frank a less memorable quote than Tina, nor Tina less than Frank. Finally I found two that seemed to be of equally great quality.


Revelations 21:4


After I had the text, font styles, and lay out just right I printed all the text that I wanted to put on my candles onto tissue paper. To get the tissue paper to run through the printer I had to tape it to a piece of copy paper.  If your not sure which side of the paper your printer will print on you may want to do a test print. Put an 'X' on one side of a piece of paper and  print, remember where the 'X' was when you loaded the paper and notice where it is when the printer spits out the finished product. Doing this should help you to figure out whether to have the tissue paper facing up or down when you load it into the printer.


After I had my text on tissue paper I cut it out and figured out how I wanted it placed on the candle. I placed the tissue paper on the candle and wrapped it in wax paper. I had to make sure the tissue paper was completely covered by wax paper and then, set on high heat, I turned the hair dryer on. I went over the entirety of the tissue paper with the hair dryer. The tissue paper disappeared into the candle as the wax melted slightly. As soon as the tissue paper had disappeared into the wax I knew it was done. It took less than a minute, but it did burn my fingers. When I do it again I'll wear gloves (I'm sure I'll be making more sets for other family members to keep in their homes).


I'm satisfied with the finished product. It's no where near as comforting as one more hug from either Frank or Tina, but it is a beautiful memorial to remember them by until it's our time to join them.


Thank you for reading, and for all the thoughts and prayers I know you're sending for mine and Jamie's families during the holidays. I know Jamie is planning to sharing how she and her family honor Jeremy's life during the Christmas season. We both pray with our whole hearts that what we share helps someone during their time of healing.

 We hope your holidays are cheery and full of joyful memories like ours are.


Monday, December 17, 2012

How to HAC


Back in our day Jamie and I had a short career in the direct sales of cosmetics. We went to weekly meetings learning about the products, how to use them, and how to sell them. One of my favorite lessons from that experience is how to HAC. Highlight and contour. The basic idea is to use varying shades of cosmetics  to 'sculpt' your face into a more flattering shape. This isn't something I do every day because, let's face it, I'm beautiful. Since you're beautiful too you probably don't need to HAC daily either. But, it is a nice tid-bit to know when you're going to have your picture taken or if you're going somewhere fancy.

Start step 1 after you've completed a good healthy skin care routine. Cleanse, exfoliate, moisturize, and protect.


Step 1: Conceal

I use a green concealer for red blemishes. Dab it on and rub it in.

Optional Step 2: Foundation

If you're skin tone is uneven and needs a little extra help to conceal discoloration and/or blemishes you may choose to use a foundation. Make sure you're foundation matches your skin tone and is applied evenly. I'm not going to provide tips on that process right now, I'm going to focus on HACing here.

Step 3: Highlight

Here's a HAC map of my face as an example

Add a highlighter to your T zone, the top of your cheek bones, and on your brow bone then blend it in. Your highlighter should be a shade lighter than your foundation or your natural skin tone.

Step 4: Contour

Add contour under the apples of your cheeks, in your temple area, under your jaw line, and (optionally) on the sides of your nose. Your contour cream/powder should be a shade darker than your foundation or your natural skin tone. 

I would advise you to use contour lightly. If you have dry patches I would skip adding contour completely, the pigment can collect in dry patches and make them stand out, giving you a blotchy look. You also have to watch out for areas where you have more fine hair than in other areas (sideburns, upper lip) these areas will also collect more pigment and I know you don't want a mustache in your holiday pictures!

Step 5: Translucent Finishing Powder
See my tutorial for making your own translucent finishing powder. You can make it for pennies out of products you probably already have in your cabinets.


A translucent powder will help blend your look, dull your shine, decrease visible pours and fine lines, and just plain make you 'HAC job' look finished.

I highlight and contour in a subtle way, I want to accent my best features while still looking natural rather than looking 'all made up'. It's okay if you have a different preference, Carlibybel has a nice vlog on this same topic. She's beautiful too and uses alot more product than I do. You might find her methods useful, check her out here.

Feel free to share your own tips or opinions by leaving a comment :)


DIY Highlight and Contour Creams


You guys have these right? Beat up eye shadows that spent too much time getting knocked around in your purse or cosmetic bag. I'm going to show you an easy-peasy way to turn them into highlight and contour creams.

Sunday, December 16, 2012

DIY Translucent Finishing Powder

I use this now on a regular basis and have been making it for pennies with ingredients that were already in my home. It's so easy!

Saturday, December 15, 2012

Old jars into organizing solutions


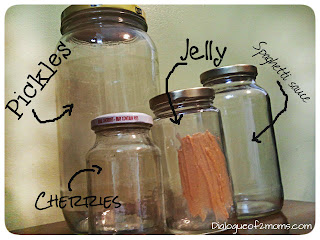
Jamie's already talked to you guys about saving those candle jars, let me add save all your jars. Waste not, want not, right? If you don't need them I'll take them!

Step 1: Collect an assortment of jars